Observatory Construction
Late in 2006 I decided to build an observatory. Since I am primarily an imager I have quite
a bit of equipment to set up and tear down and it was taking me on average over 30 minutes to set up, another
30 minutes to tear down and 20 minutes or so to polar align. I realized that eliminating the set up, polar
alignment and tear down time would give me some additional imaging time (although I usually did set up before
dark) but more importantly I wouldn't have to carry so much heavy equipment out of the house and back in which
would certainly be nice. I also realized that I was missing several nights of imaging or observing each year
due to the fact that the weather would look bad before dark and I would not set up but after dark the skies
would clear however the long set up time and heavy lifting would discourage me from setting up late and not
getting in as much time as usual. Plus as I got more equipment it began to fill the spare bedroom and having
it in the observatory would free up some space in the house. I purchased a 10' X 10' "cast resin" garden shed
kit late in the fall of 2006 which I planned to convert to a roll off roof but weather and obligations
prevented me from really starting the project until the end of April 2007. This page documents the process of
constructing the observatory.
Day 1:
5/5/2007 Since I was putting the observatory at the edge of a horse pasture and since the front
yard was fenced to keep the dogs in I decided to extend the fence around the observatory to keep the horses
away from the building and the dogs in the yard so the first order of business was to get corner posts in
and put up some fence. I spent the first day of construction going to town and renting a post hole auger and
getting fence posts and welded wire fence fabric and putting in the posts and fence. While I had the auger
I used it to start the hole for the pier by drilling a square array of holes where I wanted the base to go.
The auger saved me quite a bit of digging and was certainly the best way to get the posts put in but if I
had it to do over again I would hire a back hoe to dig the hole for the pier. In any case by the end of the
first day I had a fence and the beginnings of a hole for the pier. Here are some pictures from the first
day of construction:
 |
Site before beginning construction |
 |
Corner Posts up |
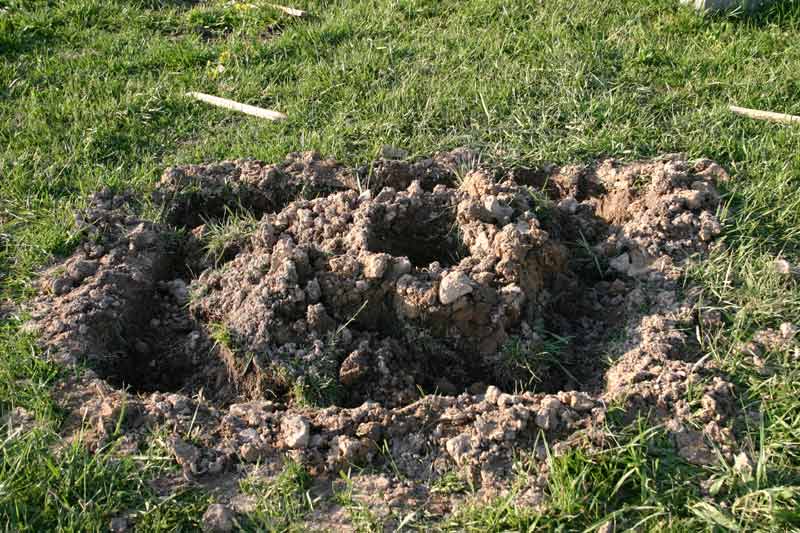 |
Beginnings of the Pier Hole |
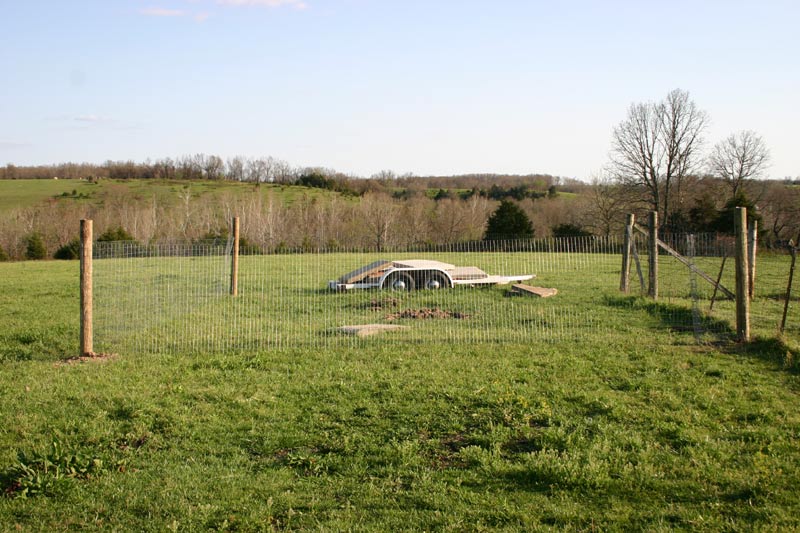 |
Day 1 Results - Fenced in |
Day 2:
5/12/2007 On the second day of construction I put up T-posts between the corner posts (3 on
each side) and finished the hole for the base of the pier except for a larger area a few inches deep
at the top where I would set the base of the form. The auger I rented couldn't go quite as deep as I
wanted the base of the pier so after digging between the holes I augered the previous weekend and
removing that dirt I had to dig another foot and a half or two feet by hand which took a really long
time not to mention being really hard work! Like I said before if I had it to do again I would hire
somene with a back hoe to do it. At the end of the second day I had a properly fenced enclosure and a
completed hole for the base of the pier. And yes, it rained between the time I finished the hole and
took the picture - our water table isn't that close to the surface here! Here is a picture of the
completed pier hole from the second day of construction:
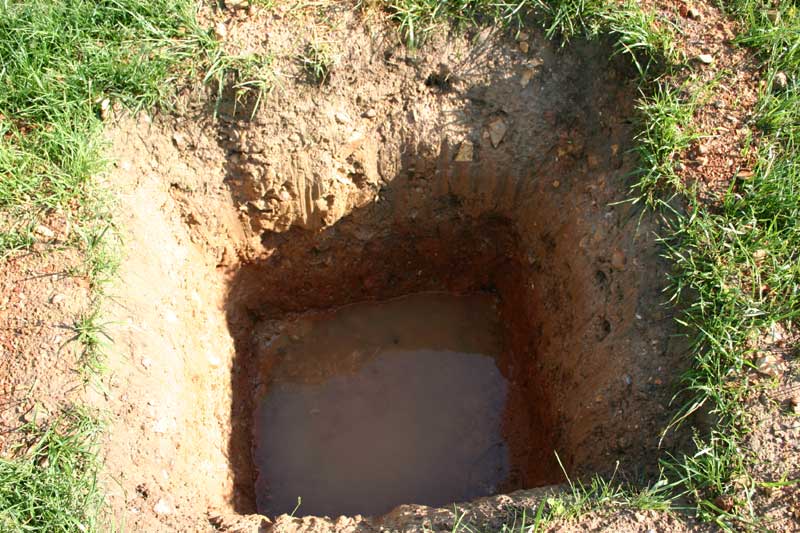 |
Hole for base of pier |
Day 3:
5/19/2007 On the third day of construction I built the rebar cage that would reinforce the base
and column of the pier and built the form for the pier. I also enlarged the top of the hole so I could
set the form in the top portion of the hole. Since I fabricated a plate to adapt my Losmandy G-11 mount
to the top of the pier over the winter everything is ready for pouring of concrete now. Here are some
pictures of the rebar cage and the form from the third day of construction:
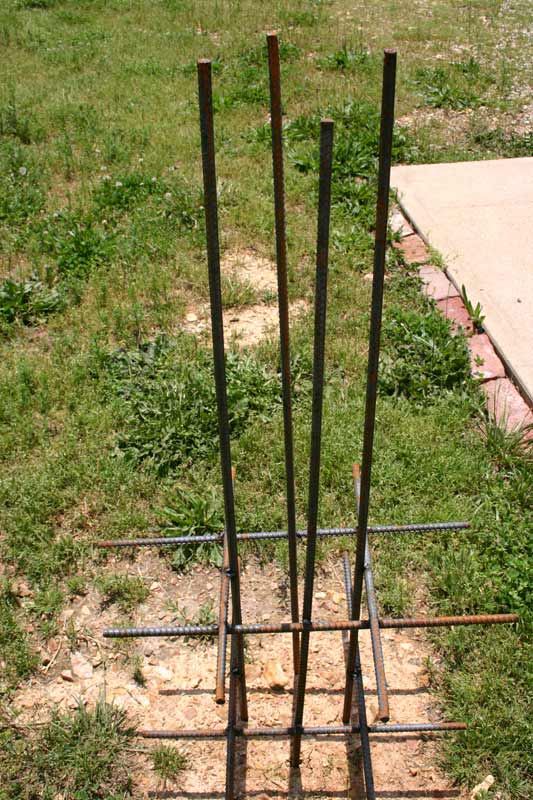 |
Rebar Cage for Pier |
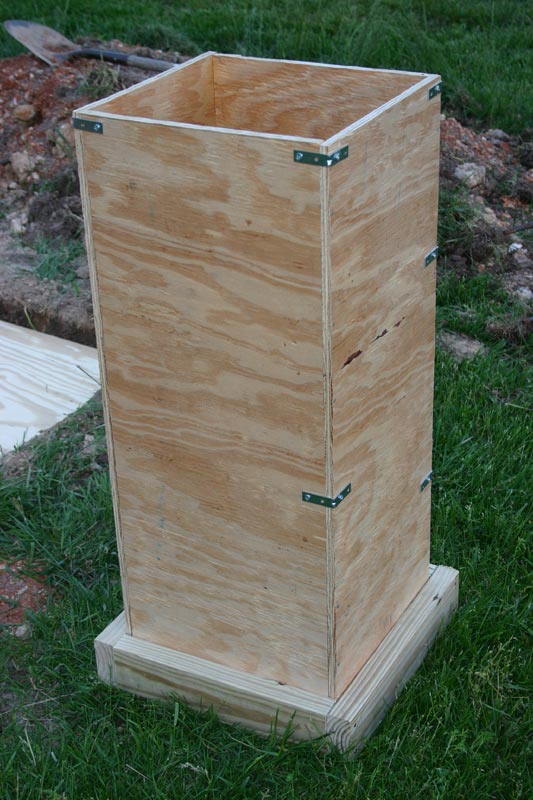 |
Pier Form (Yes the pier will be square) |
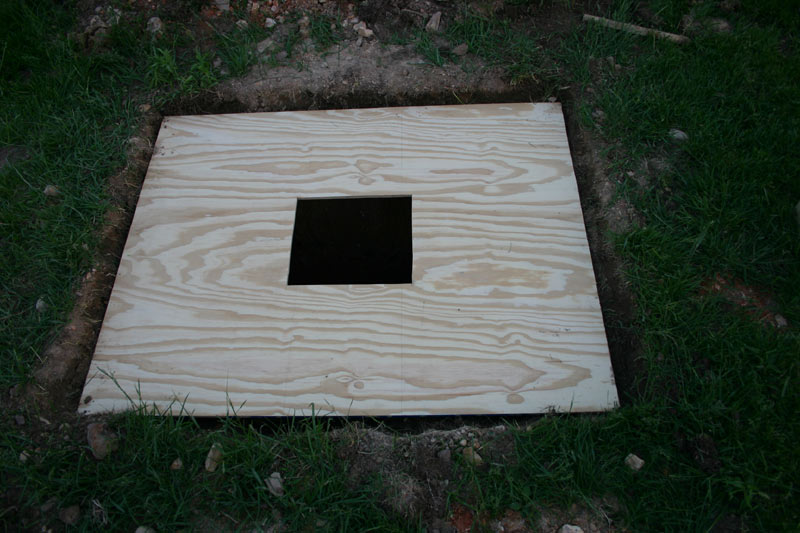 |
"Ground Board" for Pier Form |
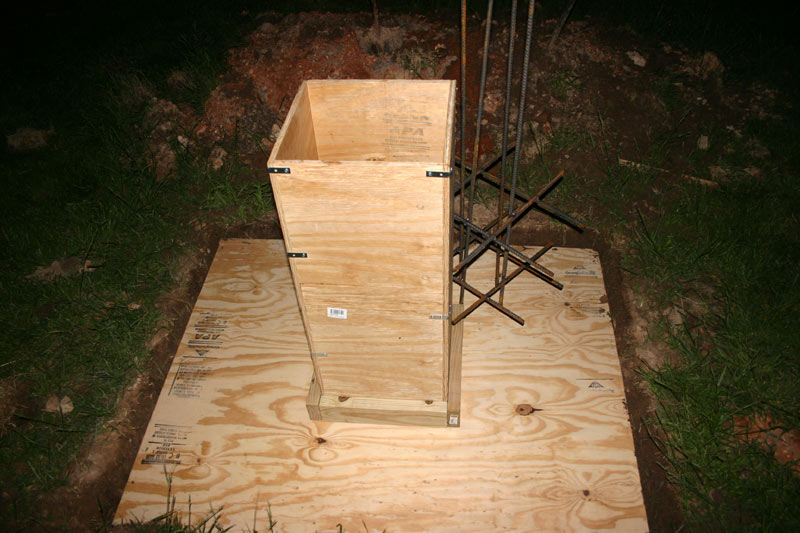 |
Assembled Form & Rebar Cage over hole |
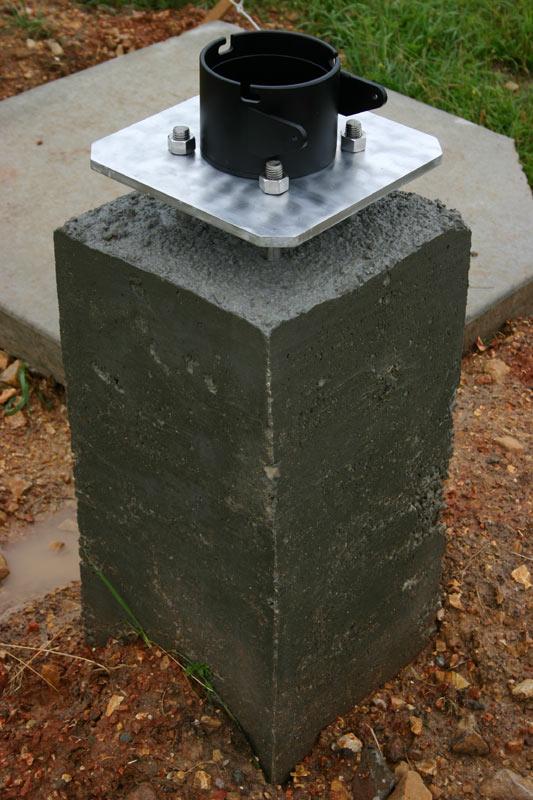
Day 4:
5/28/2007 On the fourth day of construction I removed the form from the pier and backfilled the hole
that remained over the top of the base. Since this was Memorial Day weekend I had hoped to make lots of
progress but Saturday after I got back from picking up supplies it started raining and rained the rest of the
day. On Sunday I took my mother to the cemetaries and to a late lunch and by the time I got back from that I
was only able to get a little work done. On Monday I did manage to get the concrete slabs that will serve as
the foundation in place and nearly level but I didn't get any pictures so here is the only one I have to show
the weekend's progress - the finished pier:
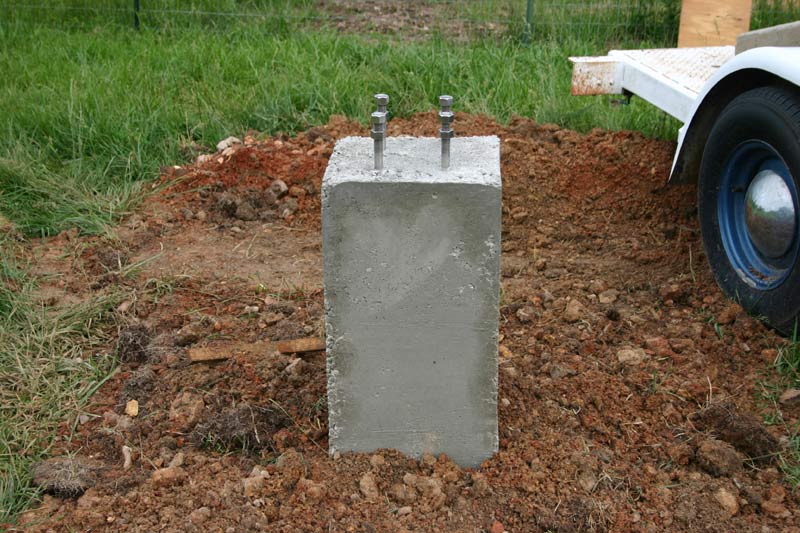 |
Finished Pier |
Day 5:
6/2/2007 Well the weather and other obligations bit me again as far as progress but I
did get some important stuff done. I got most of the foundation finished and level and put some finishing
touches on the pier/mount adapter plate. Also there was actually a break in the clouds tonight so I was
able to put the mount head on the adapter and plate and put it all on the pier so I could mark the final
mounting position of the adapter on the plate. Here are a couple of pics of the plate and adapter on the
pier:
 |
Pier Plate & Adapter on Pier |
 |
Pier Plate & Adapter on Pier |
Day 6:
6/9/2007 I got the rest of the foundation work done and leveled and got about 3/4 of the
floor installed. I got all but one of the floor panels cut that had to have portions cut out to clear the
pier. I didn't bother to take any pictures of the partially finished floor.
Day 7:
6/16/2007 Major progress today! I got the building assembled although at this point it
is still basically just a storage shed as I haven't converted the roof to roll/slide off yet. I also got the
pier plate and mount adapter installed and the EQ head on mounted on them. Hopefully next weekend I can
get the roof to roll or slide off!
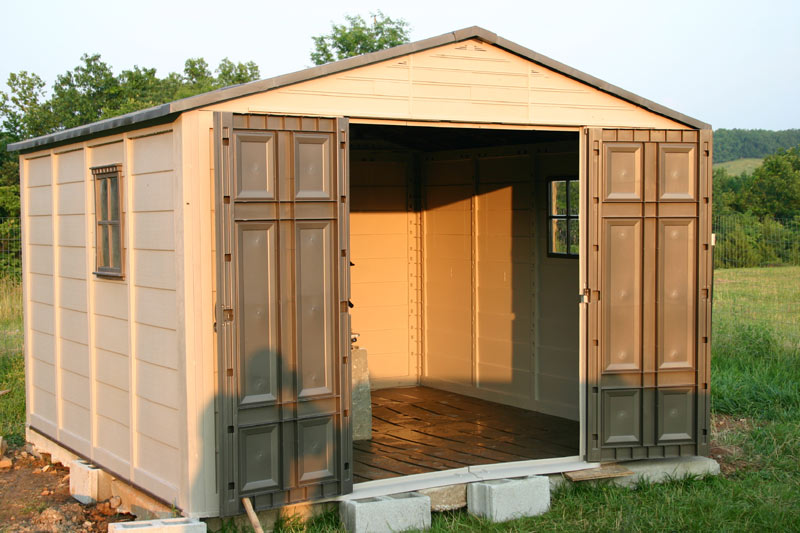 |
Front view of Building |
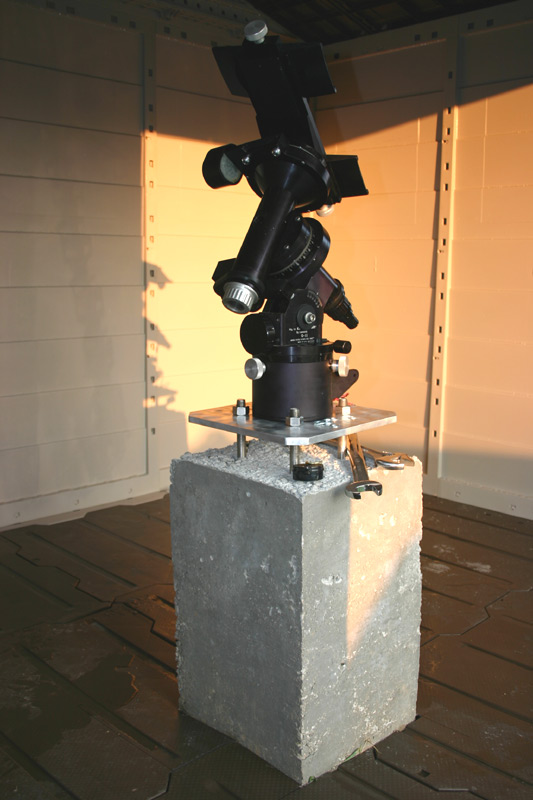 |
Interior - Pier & Mount |
Day 8:
6/23/2007 Today I got most of the framework at the top of the walls that the roof will
roll or slide on finished. A supply run and the weather kept me from making more progress. We have had
lots of rain, storms and flash flooding in the last week or so and the interior is dry so apparently the
shed is going to be weatherproof. Hopefully next week I will get the roof moving. I didn't bother to take
any pics but I will take some once I get everything in place for the roof to move.
Day 9:
6/30/2007 Today I got the rest of the framework at the top of the walls and the frame that
the roof is attached to finished. All I need to do is put up the side boards that will keep the roof on the
runners and the end seals/stops and the outriggers that the roof will rest on when open and the observatory
will be functional. With a day off this week for the July 4th holiday I may be ready for first light next
weekend! Again no pics this weekend but I will take some once everything is working.
Day 10:
7/4/2007 Today I got the outriggers that the roof will rest on when open attached to the
building and I got one of the side/guide boards attached. I also got the anchors at one end of the building
changed from the "over the roof" method I was using temporarily (which obviously won't work if the roof is
to move!) to a permanent solution using screw eyes through the walls into the corner posts of the internal
frame and hook/eye turnbuckles attaching the wire rope to the eyes so it is easy to keep the cables tight
and easy to remove them if necessary. If the weather holds it looks like this weekend will definitely see
the roof move and the basic struture complete! I should have lots of pics to post also.
Day 11:
7/7/2007 It moves!! (the roof that is) Today I got casters on the roof, the remaining
guide board installed and the rest of the bracing on the outriggers. I also got some turnbuckles and eyes
installed to hold the roof in place when closed and got another anchor converted to use an eye bolt through
the corner post and a turnbuckle on the wire rope. I still need to paint some of the outrigger structure
and do lots of minor things but the basic structure is complete and functional. Here is a poor picture of
the observatory with the roof partially open.
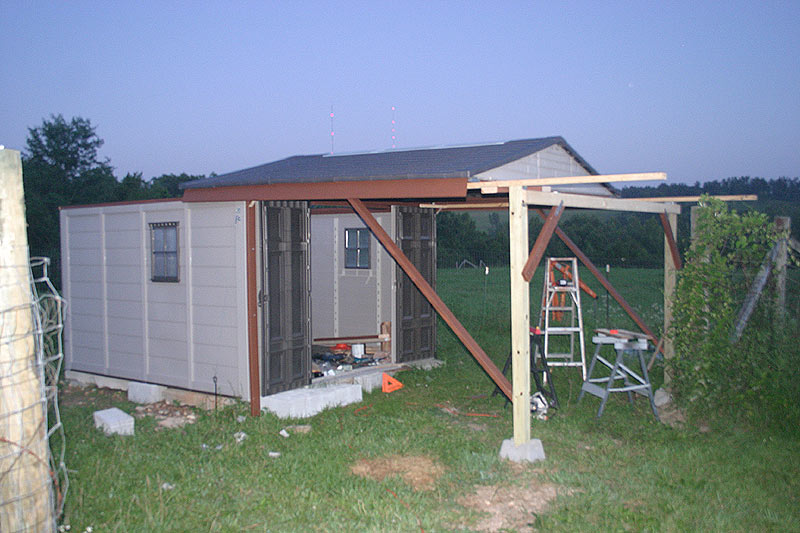 |
View with roof partially open |
First Light!!:
7/13/2007 First Light!! I got to use the observatory for the first time - on Friday the 13th
of all days! Contrary to what the triskadecaphobics (fear of the number 13) would think my first sessions in
the observatory this weekend went well. I am really happy to have it and it really makes observing and imaging
easier. Set up time is only a few minutes (turn on power, open roof) and there is no carrying of heavy equipment
out of the house and even better after a long night there is no tear down and lugging stuff back in!! I still
have lots of minor details to complete - painting, computer desk, cable routing, etc. but while that is being
done at least it is usable. Here is my first light image from Friday night and another from Saturday night:
 |
M8/M20/M21 in Saggitarius |
 |
IC1318/Gamma Cygni region |